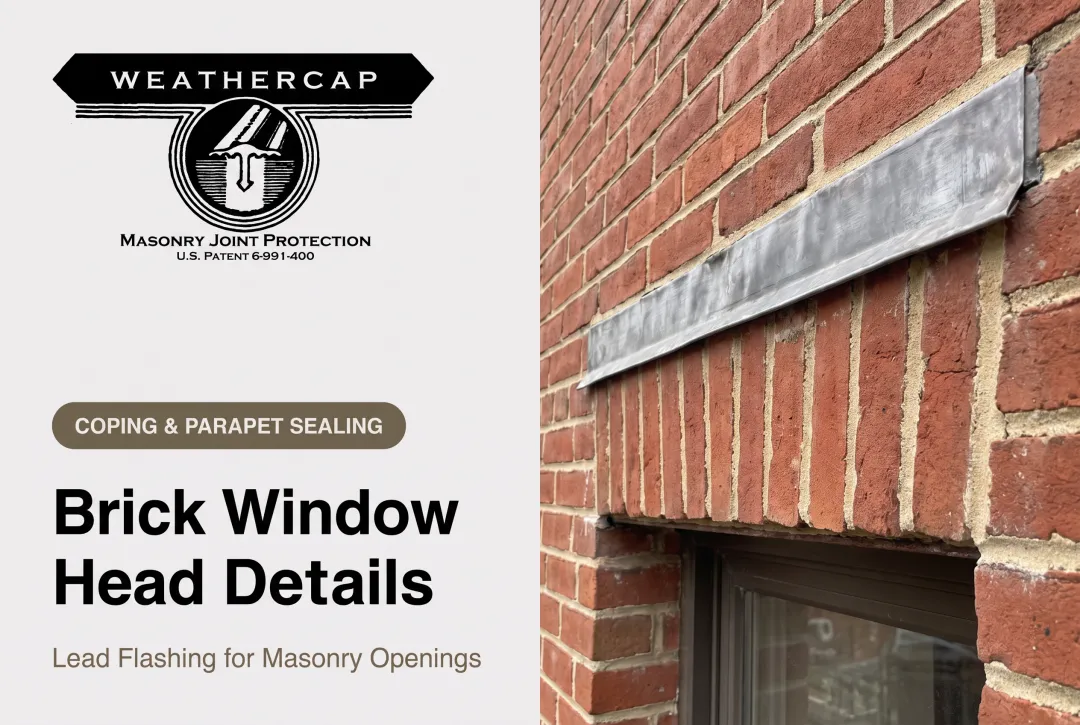
Improperly detailed jambs, heads, and sills are one of the most common causes of water infiltration in brick veneer and structural masonry construction. Small gaps in flashing or a failed sealant joint let water travel behind the brick face, where it damages sheathing, corrodes anchors, and stains masonry from the inside out.
This guide breaks down the anatomy of a brick wall window detail: how positioning affects performance, how to protect the masonry joint around the frame, and what changes when you're working on a historic building.
Key Takeaways
- Head, jamb, and sill details each need dedicated flashing and drainage paths, not just caulk
- Window positioning (centered, deep-reveal, or flush) affects shadow lines and solar exposure, not just aesthetics
- Backer rod plus sealant is the baseline joint protection; lead strip systems extend sealant life at high-movement joints
- Historic masonry openings usually require preservation review before any detail changes
- Existing wall openings cost more than in-kind replacement due to structural and flashing work
Key Components of a Brick Wall Window Detail
Every brick window opening depends on five interlocking parts working together. Miss one, and the whole system is compromised.
The Head Detail and Lintel
The lintel carries the brick load above the opening: steel angle, precast concrete, or a thermally-broken assembly. Behind the lintel, a cavity seal between the back of the lintel and the interior wythe limits air leakage. That seal should tie into the jamb seals so continuity runs the full perimeter.
Jambs, Cavity Closers, and the Sill
At the jambs, cavity closers and insulation reduce cold bridging at the reveal (the exposed masonry return around the frame). At the sill, a projecting sill with a drip edge directs water away from the wall face. According to BIA Technical Note 21B, sill flashing should extend 1/4 inch beyond the wall plane and turn down at 45 degrees to form a proper drip. Terminate flashing behind the wall face, and water simply re-enters the cavity.
Flashing, Weeps, and Anchorage
Flashing, weeps, and anchorage finish the opening and keep incidental water under control:
- End dams stop water from migrating past the jambs
- Weeps sit immediately above flashing: 24 inches on center for open head joints, 16 inches for wick or tube weeps
- Straps or clips anchor the frame to the backup structure while minimizing thermal bridging through the connection The GSA Historic Preservation Technical Procedures outline specific approaches for maintaining these details on landmark masonry buildings, including how to protect sealed joints once they are in place. That protection step is covered below.

Window Positioning Within the Brick Wall
Where you set the window within the wall depth changes how the building performs and looks. There are three common approaches.
Centered Position
Centering the frame within the wall depth is the most common modern approach. It balances thermal performance with a manageable reveal depth on both interior and exterior faces. The symmetrical reveal also simplifies flashing continuity.
Deep or Full Brick Reveal
A deep reveal, where the window sits closer to the interior face, reduces solar gain and creates strong shadow lines across the facade. This approach requires a wider cavity to accommodate a full brick return at the jambs, which adds material and labor cost.
Flush with Exterior Face
Setting the frame flush with the exterior brick face creates a larger interior sill and reduces exterior reveal depth to nearly zero. This works best on walls that don't face direct sun, since there's no reveal to shade the glass.
Thermal Performance
No single U.S. source offers a definitive ranking of centered versus deep-reveal versus flush installations for thermal bridging. What's well established, per Building Science Corporation's guidance on load-bearing masonry retrofits, is that continuity of the insulation and water-control layers matters more than which position you choose.
Even a 1-inch sill projection can materially change how much water reaches the wall face. Choose position based on solar orientation, cavity depth available, and detailing continuity—not a universal "best" answer.

Sealing and Protecting the Masonry Joint Around Windows
The perimeter joint between window frame and brick is under constant stress. Thermal expansion, settlement, and freeze-thaw cycles all push and pull on that joint — and so do the adjacent coping and parapet joints. Sealants that aren't designed for this movement crack, and once they crack, water gets behind the brick.
Backer Rod and Sealant Geometry
Correct joint design starts before the sealant gun ever comes out:
- Backer rod should be roughly 25% wider than the joint opening
- Set it to achieve a 2:1 width-to-depth ratio
- Never puncture, stretch, or twist the rod during installation
- Tool the sealant to an hourglass shape for proper adhesion and cohesion at both edges
Even perfect geometry fails without prep: substrates must be dry, clean, and structurally sound before any sealant goes in.
Interposing a Lead Strip System
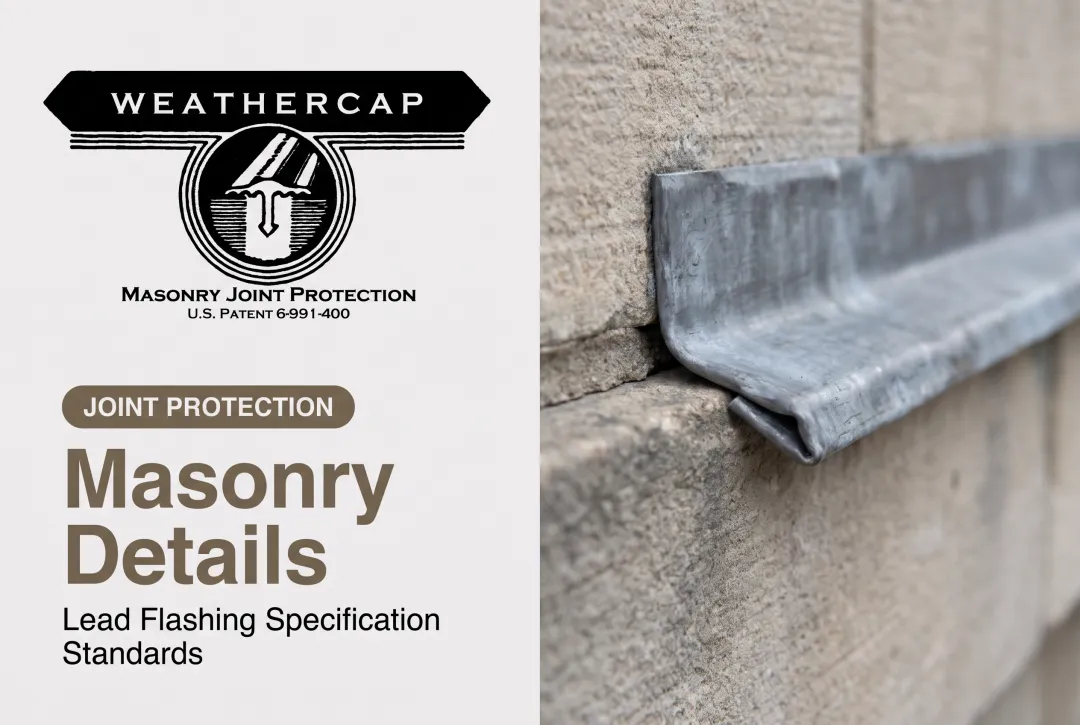
Even well-installed sealant eventually fatigues under repeated movement. This is where a soft lead strip system like WEATHERCAP® comes in. It's interposed within the sealant-filled joint — including at right-angle wall junctions near window openings, where a projecting lintel meets a side wall or parapet — and physically reduces the effective joint opening the sealant has to span, cutting it by roughly half.
The system comes in two configurations:
- Type A (Flat Cap) — for coping, cross joints, and lintel-top joints, in sizes A-2 through A-8 covering joints up to 1.5 inches
- Type B (90° Cove Cap) — for right-angle wall junctions, window-frame perimeters, and sill-to-frame joints, in sizes B-2 through B-8
WEATHERCAP also holds up in service:
- Resists corrosion, mold, and mildew
- Oxidizes quickly to a dead neutral grey that blends with surrounding brick
- Paintable when a closer color match is needed

The system is specified in the GSA's Historic Preservation Technical Procedures (Document No. 07656-01) and has been used on restorations at the Washington Monument, the U.S. Supreme Court, and the Smithsonian Institution.
Installing a Window in an Existing Brick Wall
Cutting a new opening into an existing brick wall is a structural project. It needs load assessment, temporary support, and a correctly sized lintel before the window goes in.
General process:
- Assess load-bearing capacity of the wall and surrounding structure before any cutting begins
- Mark the opening and cut from the top down to control stress on the masonry
- Install temporary shoring so the wall above the cut stays supported
- Frame the new opening with a properly sized lintel rated for the load path
- Install the window, then flash and seal the perimeter joint

Full-Frame Replacement vs. Isolating the Window
If the existing weather-resistive barrier behind the brick veneer is missing or unreliable — common in older construction — a full-frame replacement that rebuilds the flashing and barrier system is usually the safer bet. Simply swapping the sash while leaving a compromised barrier in place just delays the next leak.
On cost: Pricing depends on opening size, wall accessibility, lintel design, and whether structural engineering is required. Get a site-specific quote from a masonry contractor that accounts for your wall's actual construction and condition.
Special Considerations for Historic and Landmark Masonry
Historic masonry window details come with a different set of rules.
- Many jurisdictions require landmark commission or preservation authority approval before altering historic window openings
- New flashing or tape connections often must stay concealed behind existing trim to protect original appearance
- Traditional sill-to-frame caulk joints and check reveals need periodic resealing; they were not designed for modern sealants
- Architects on restoration projects specify systems with a documented track record on landmark buildings
- Weathercap's CAD drawings, sample specifications, and MSDS documentation support preservation-compliant specification work
Frequently Asked Questions
How are windows installed in brick?
Assess structural support first, then cut the opening from the top down with temporary shoring. Frame with a proper lintel, and finish by flashing and sealing the perimeter joint based on the wall's condition.
What is a check reveal window detail?
A check reveal is a rebated or stepped masonry opening designed to receive a window frame flush or recessed into the brick. It improves weather resistance and creates deeper shadow lines around the frame.
Can you add a window to a double brick or solid concrete wall?
Yes. You'll need a properly engineered lintel to carry the load once supported by the removed masonry, plus temporary shoring during the cut.
Do I need a permit to cut a new window opening in a brick wall?
Almost always, yes. Most jurisdictions require permits for structural or exterior appearance changes. Some cities exempt in-kind replacement, but new openings nearly always need approval.
How do you keep water from getting behind brick veneer at a window?
Head and sill flashing direct incidental water back out of the wall, while backer rod and sealant seal the perimeter joint. A lead strip system like WEATHERCAP® adds protection at high-movement joints by extending sealant life.
What causes caulk joints around brick windows to fail?
Unaddressed building movement and settlement stress the sealant beyond its elastic capacity over time. The joint cracks, adhesion fails, and water works behind the brick face.