Control joints and expansion joints exist to manage that movement, but confusing the two—or skipping them altogether—leads to unplanned cracking and costly repairs. This guide breaks down what each joint type does, where building codes and industry standards say to place them, and why even correctly installed joints eventually fail without additional protection.
If you're a restoration contractor, architect, or work with a preservation body managing historic masonry, this is written for you.
Key Takeaways
- Control joints guide shrinkage cracks to planned locations; expansion joints absorb movement without cracking
- Concrete slab joints typically sit 24 to 36 times the slab thickness apart
- CMU walls generally need control joints every 20 to 25 feet, per CMHA guidance
- Sealant alone degrades under UV and cyclic movement; supplemental protection extends joint life
- Annual inspection catches joint failure before water damage sets in
What Are Control and Expansion Joints?
Control joints are planned weak points (saw cuts, tooled grooves, or raked mortar joints) that steer shrinkage cracking along a set line instead of across a wall or slab at random.
ACI's technical FAQ defines a contraction joint as a formed, sawed, or tooled groove that creates a weakened plane so cracking occurs where you intend, according to ACI FAQ 864.
Expansion joints are gaps filled with compressible material that let building materials expand and contract without transferring stress into the surrounding masonry. In slab-on-ground applications, ACI describes this as a separation filled with compressible filler.
Both joint types exist because masonry, concrete, and adjacent building materials move continuously and predictably from:
- Thermal cycling (daily and seasonal temperature swings)
- Moisture absorption and drying
- Structural settlement
- Seismic activity
Related Joint Terms
Specs often use nearby terms that get mixed up with control and expansion joints:
- Contraction joints: Another name for control joints; same weakened-plane idea to locate shrinkage cracks
- Isolation joints: Separate concrete or masonry sections so loads and differential movement are not transferred
- Construction joints: Mark where one concrete placement stopped and the next began; sequencing, not movement design
Material choice matters too. CMHA masonry guidance typically calls for expansion joints in clay masonry to handle unit expansion. Concrete masonry generally relies on control joints instead.
Control Joint vs Expansion Joint: Key Differences
The core distinction is simple: control joints manage where cracking happens; expansion joints prevent cracking by allowing movement. But the practical differences go deeper.
Sizing and Materials
| Feature | Control Joint | Expansion Joint |
|---|---|---|
| Typical width | Narrow saw cut or tooled groove | 3/8" to 1/2" for brickwork, per BIA |
| Material | Sealant or tooling (backer rod where specified) | Compressible filler plus sealant |
| Compression range | N/A | 25%–50%, per BIA guidance |
| Applies within | Single continuous material | Where different materials or sections meet |

For CMU control joints specifically, CMHA classifies these as butt joints where sealant sees cyclical tension and compression. Backup material must compress as the joint closes and recover as it opens:
- Closed-cell backer rod: size 1¼ to 1⅓ times joint width for about 25%–30% compression
- Open-cell backer rod: size 1½ times joint width for about 50% compression
Why the Distinction Matters
Using the wrong joint type in the wrong place causes real problems:
- A control joint placed where an expansion joint belongs won't accommodate enough movement, leading to unplanned cracking elsewhere
- An expansion joint used within a single continuous concrete pour wastes material and adds unnecessary complexity
- Confusing the two in specifications leads to water infiltration once the joint opens beyond what the sealant can bridge
Get the application wrong, and you're looking at repair costs that dwarf the price of doing it correctly the first time.
Where and How Often to Place Control Joints
Industry bodies publish spacing benchmarks built on decades of field data.
Concrete Slabs
NRMCA's CIP #6 guidance recommends joint spacing of 24 to 36 times the slab thickness. For a standard 4-inch slab, that works out to roughly 10 feet between joints. Timing matters too:
- Early-entry saw cuts: 1 to 4 hours after finishing
- Conventional saw cuts: 4 to 12 hours after finishing
CMU Walls
CMHA's empirical method, outlined in Tech Note CMU-TEC-009-25, sets maximum spacing at the lesser of a 1.5:1 length-to-height ratio or 25 feet, 4 inches. For 4-inch nominal CMU and concrete masonry veneer specifically, the cap drops to 20 feet.
Engineered designs may go wider, up to 25 feet, 4 inches, when project-specific shrinkage data supports it.

High-Stress Locations
Regardless of standard spacing intervals, control joints belong at:
- Wall corners and junctions
- Points where wall height or thickness changes
- Around penetrations (doors, windows, utility openings)
- Where different structural systems meet
Skipping joints at these points is one of the most common causes of unplanned cracking, even when overall spacing looks correct on paper.
Why Masonry Joints Fail Over Time
Even correctly placed and sealed joints don't last forever. Sealant is the weak link.
According to NIST's study on accelerated weathering in building joint sealants, sealants endure daily strain cycles of roughly ±7% and yearly cycles of roughly ±25%. Over time, UV exposure, freeze-thaw cycling, and continuous movement break down the sealant's molecular structure until it can no longer respond elastically to that strain.
What Happens When Sealant Fails
- Water infiltration through the compromised joint
- Mold and mildew growth behind the wall assembly
- Corrosion of embedded metal anchors, ties, and reinforcement
- Progressive structural deterioration as water cycles through freeze-thaw seasons
The National Park Service calls water "the most destructive force on historic masonry surfaces," warning that it can wick into brick cores and cause serious freeze-thaw damage in northern climates.
A Longer-Term Solution: Interposed Lead Strip Protection
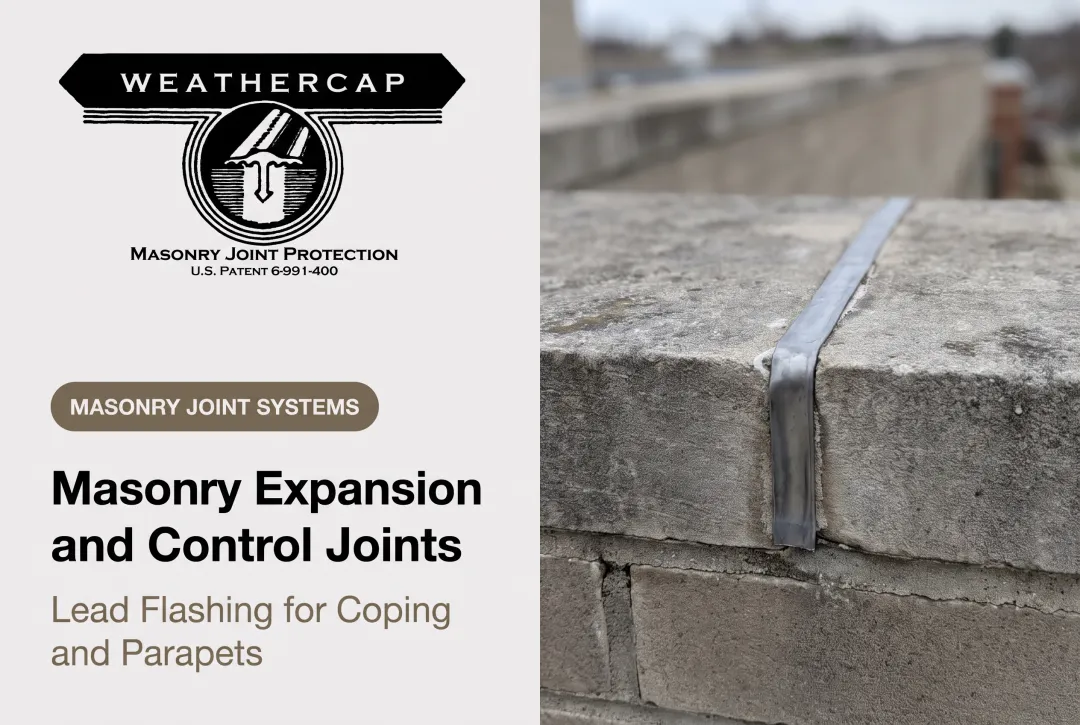
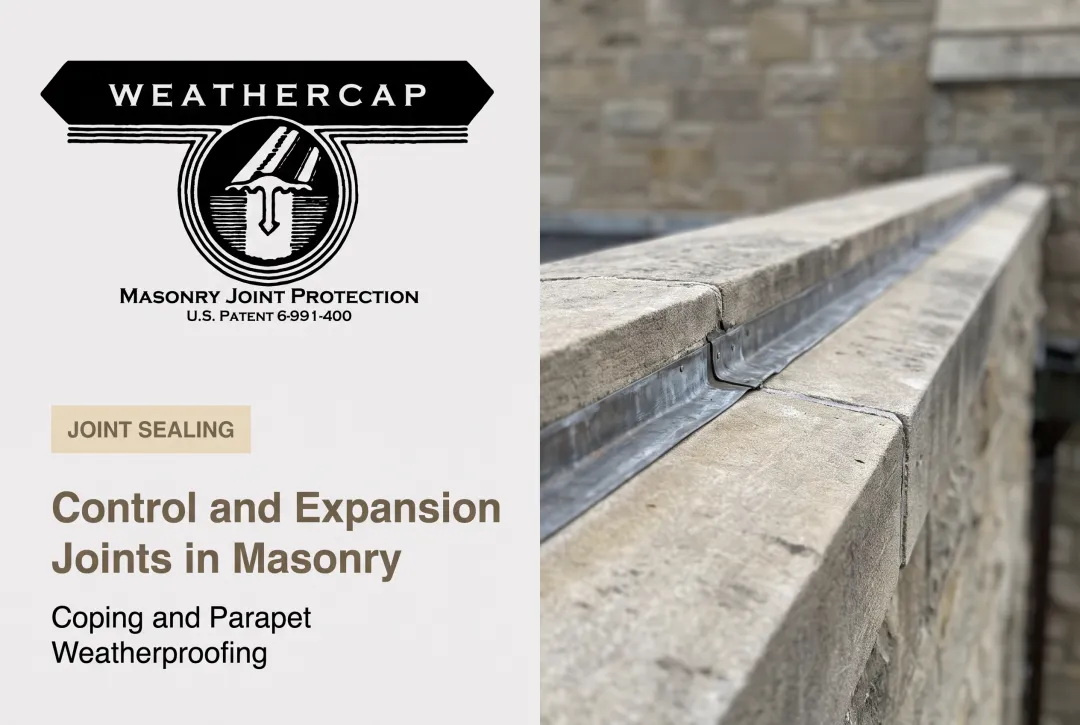
Weathercap's patented soft lead strip system addresses that failure mode. Rather than relying on sealant alone, the strip is physically interposed within the joint, bedded into the caulking. Because lead has low tensile strength, low hardness, and low creep strength, it gradually deforms into the joint's new shape as the building moves, rather than tearing or cracking the way rigid materials do.
The practical effect: Weathercap reduces the effective sealant opening by up to half, meaning less of the joint's total movement gets transferred directly onto the sealant. Less strain on the sealant means a longer functional life for the whole assembly.

This isn't a theoretical fix. Weathercap has been used on the Washington Monument, the U.S. Supreme Court, the U.S. Capitol, and the Smithsonian Institution, buildings where joint failure isn't an option.
The system is specifically named in the GSA Historic Preservation Technical Procedures, Document 07656-01, which governs installing lead stone flashing to protect masonry joints on federal and historic structures. For restoration architects under preservation oversight, that specification carries real weight.
There's also a practical aesthetic bonus: the lead surface oxidizes rapidly to a neutral gray, blending into most masonry rather than standing out as a visible repair.
Repair and Maintenance Best Practices
Joint maintenance doesn't need to be complicated, but it does need to be consistent.
Inspection
Check joints at least annually for:
- Visible cracking or separation
- Gaps where filler or sealant has pulled away
- Missing or degraded backer rod
- Discoloration suggesting moisture behind the joint
The NPS recommends periodic inspection as part of standard masonry maintenance, particularly for active cracks that need flexible sealant rather than rigid mortar.
The Professional Repair Sequence
- Diagnose the cause of movement before any cosmetic work so the repair addresses why the joint failed
- Remove all failed sealant completely and clean the joint substrate
- Install backer rod at the correct depth, sized appropriately for the joint width
- Reseal with flexible caulk rated for the anticipated movement
Where longer-term protection matters, interpose a Weathercap lead joint cap during resealing:
- Seat the backer rod first
- Apply sealant into the prepared joint
- Press the pre-fitted lead cap into the sealant bed until the underside grooves fill with no voids
- Keep at least ¼ inch of sealant between the anchor-shaft tip and the backer rod

Safety note: Because Weathercap is 99.9% lead, installers should wear gloves throughout handling and wash hands thoroughly afterward. If installation generates dust or fumes, ventilation and respiratory protection become necessary per OSHA exposure limits.
Interposed lead-cap protection shields the sealant from weather and joint movement, so repairs last longer than caulk alone—especially on buildings where frequent resealing is costly or disruptive.
Frequently Asked Questions
What is the difference between a control joint and an expansion joint?
Control joints direct shrinkage cracking to a planned location within one continuous material. Expansion joints are compressible gaps that allow movement between separate materials or building sections, preventing cracking altogether.
How much does an expansion joint cost?
Costs vary widely based on joint length, width, material removal needs, and whether it's a basic sealant application or an engineered system. Get a contractor quote for an accurate number specific to your project.
Where do you put control joints in concrete?
Standard spacing runs 24 to 36 times the slab thickness, or about 10 feet for a 4-inch slab. Always add joints at corners, penetrations, and changes in slab thickness.
Are control joints necessary in concrete?
Yes. Without them, concrete cracks randomly and unpredictably as it shrinks. Any slab beyond a small size needs planned control joints to manage that cracking.
What does an expansion joint do?
It accommodates thermal, seismic, and settlement-related movement between building elements, preventing the stress from cracking the surrounding masonry or concrete.
How often do you need control joints in CMU walls?
CMHA's empirical method caps spacing at the lesser of a 1.5:1 length-to-height ratio or 25 feet 4 inches, dropping to 20 feet for certain wall types. Wall height and reinforcement level affect the exact spacing.