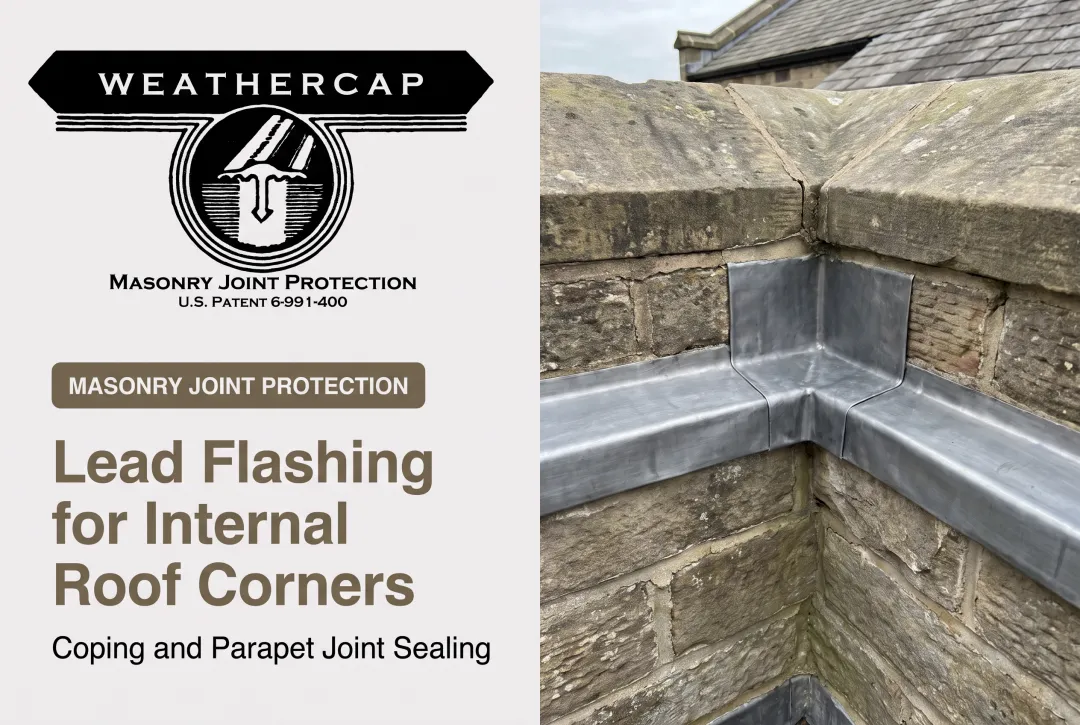
A lead sill flashing intercepts water that gets past the sealant joint and channels it back out of the wall, rather than letting it soak into the masonry below. It looks like a straightforward strip of metal tucked under a sill. But results vary enormously depending on lead gauge, joint prep, overlap technique, and how well the flashing ties into the surrounding jamb flashing and sealant.
This guide covers when lead sill flashing makes sense, what you need to do it correctly, the exact installation sequence, the variables that separate a durable joint from a failed one, and the mistakes that cause leaks years down the road.
TL;DR
- Lead sill flashing is a malleable strip under a masonry sill that sheds water and shields the sealant from building movement.
- Best for masonry, stone, or brick openings—especially historic work—where sealant alone can't handle joint movement.
- Needs a clean sloped substrate, formed end dams, and correct overlap with jamb flashing and the drip edge.
- Performance depends on lead thickness, slope, end dam height, and sealant compatibility.
- Systems like WEATHERCAP® cut joint-movement stress and extend sealant life under the sill.
How to Flash Under a Lead Window Sill
Step 1: Prepare the Sill Opening and Substrate
Start by cleaning the masonry surface thoroughly. Debris, mortar burrs, and old sealant residue will all prevent the lead from seating properly. Before setting anything, verify the substrate slopes slightly outward so water drains away from the building rather than pooling against it. The Brick Industry Association confirms the sill top should slope down and away from the wall, with a drip at the outer edge so water cannot return to the face (BIA Technical Note 36). Check clearance too. The rough masonry opening needs enough room for the lead strip to dress up the jambs without kinking or tearing.
Step 2: Cut and Form the Lead Strip
Cut the lead to length, leaving extra material at both jambs to form end dams by turning the ends upward. Those upturns stop water from spilling laterally into the wall cavity at the flashing edges. Use a soft mallet or hand dressing tool to shape the lead tightly to the sill profile. Work it gradually: lead tears and thins if forced too aggressively in one spot. Before moving on, confirm the strip extends far enough back under the sill to fully cover the joint area. A strip that stops short defeats the entire purpose of the detail.

Step 3: Set and Secure the Flashing
Bed the lead in a compatible sealant or mechanically fasten it per manufacturer instructions, but never drive fasteners through the drainage plane itself. A puncture here creates the exact leak path you're trying to eliminate. Make sure the flashing overlaps correctly with adjacent jamb flashing, applied shingle-style from bottom to top. This sequencing directs water outward instead of trapping it behind the flashing. For joints where sealant alone won't hold up to ongoing movement, a system like WEATHERCAP's soft lead strip is interposed between the sealant and the sill. It's manufactured in two configurations:
- Type A (Flat Cap): sizes A-2 through A-8, covering joint openings from under 3/8" up to 1.5"
- Type B (90° Cove Cap): sizes B-2 through B-8, covering openings from under 5/16" up to 1.25" Both types are specifically listed for joints between a window frame's sill and the masonry supporting sill. Size by measuring the joint, adding anticipated movement, and tacking on 1/4 inch. Do not guess a size off the shelf.

Step 4: Seal and Finish the Joint
Apply a sealant compatible with both the lead and the masonry substrate, tooling it smoothly over the flashing edge. If you're installing a product like WEATHERCAP, fill the joint with sealant to roughly 1/8 inch above the masonry surface. Press the strip firmly into that bed until the underside bonding grooves are fully filled, with no voids or air pockets. Before closing up the work, check that weep paths remain open so trapped moisture can escape instead of pooling behind the flashing. Then inspect for:
- Continuous coverage across the full joint length
- No exposed fasteners anywhere in the drainage path
- A neutral-gray lead finish, which will blend naturally with the masonry as it oxidizes
When Should You Flash Under a Lead Window Sill?
Not every window needs lead sill flashing. It earns its place where masonry movement or historic material sensitivity is a genuine concern.
Typical use cases:
- Stone or brick masonry sills prone to differential movement
- Historic restoration projects where sealant alone has already failed once
- Joints subject to significant building settlement over time
Where it's less practical:
Modern vinyl or metal-clad window systems already use membrane-based flashing systems designed into the wall assembly. Retrofitting lead strip into that context usually adds complexity without a matching benefit.
Scale matters, too. Landmark and institutional masonry projects frequently specify lead strip systems for long-term joint durability. GSA's own Historic Preservation Technical Procedures document (07656-01) describes this exact detail for exposed masonry joints on parapets, copings, cornices, and window sills where existing caulk has failed under movement stress.
What You Need and Key Parameters That Affect Results
Outcomes here depend less on brand names and more on how well you control a handful of variables.
Gather these before you start:
- Lead flashing at the correct gauge for exterior exposure
- Soft mallet and forming/dressing tools
- Compatible sealant and backer rod
- PPE for lead work (gloves; wash hands after handling)
- Manufacturer sizing guidance (joint width + movement + 1/4")
Those materials only perform if four parameters are right: gauge, slope, end dams, and sealant compatibility.
Lead Gauge and Slope
Thinner lead tears under stress during forming or building movement. Insufficient slope on the substrate causes ponding instead of drainage. Gauge and slope largely set long-term leak resistance; get either wrong and the rest of the detail fails early.
End Dam Height and Overlap
Missing or undersized end dams let water spill off the sides directly into the wall cavity. Industry detailing calls for a vertical return of at least 1 inch at terminations (International Masonry Institute end dam detail). WEATHERCAP's own installation guidance similarly requires an end turn-down of at least 1 inch on exposed faces, with cap-to-joint overlap of no less than 1/8 inch.

Sealant and Substrate Compatibility
Mismatched sealants can degrade the lead or fail to bond to masonry entirely. Before production work, test the sealant to confirm it will not stain the substrate—a step GSA's procedure explicitly requires. Compatible materials extend joint life and reduce callbacks.
Common Mistakes and Troubleshooting
Most failures trace back to skipped prep or a broken drainage sequence:
- Skipping substrate cleaning or slope verification before setting flashing
- Puncturing the lead with fasteners, creating leak points that defeat the flashing's purpose
- Reversing the overlap sequence so water runs behind rather than over the flashing
Problem: Water Stains Appearing Below the Sill
Likely cause: Missing or undersized end dams.
What to check: Inspect the jamb returns first. If water is escaping laterally rather than draining outward, re-form the end dams with a taller turn-up.
Problem: Sealant Failing Prematurely
Likely cause: Incompatible sealant, or ongoing joint movement that was never addressed.
What to check: Install a soft lead joint protection strip such as WEATHERCAP® so the strip absorbs movement and takes stress off the sealant. Sealant that keeps stretching and compressing will fail again after replacement; the movement needs somewhere else to go.

Conclusion
Flashing under a lead window sill works when the substrate is properly prepped, sloped correctly, and overlapped in the right sequence. Skip any one of those steps and the detail becomes decorative rather than functional.
Most failures on real projects trace back to a handful of causes:
- Unclean substrates
- Undersized end dams
- Lead gauge that can't absorb the movement demanded of it
Pair sound installation technique with a joint protection product sized for the joint width and anticipated movement. That mix delivers long-term durability with a process crews can actually run in the field.
Frequently Asked Questions
Do you need flashing under windows?
Yes for most masonry sills—flashing is recommended wherever sealant alone can't handle water diversion and building movement. Modern assemblies with integrated membrane flashing may not need an added lead strip.
What is the flashing under a window called?
It's typically called sill flashing or a sill pan. When made of soft lead specifically for masonry joint protection, it's referred to as a lead sill flashing or lead strip.
Should there always be a lead tray under a window?
No. Lead sill flashing is strongly recommended for masonry and historic restoration work, but it isn't required for every window type or wall assembly.
What type of flashing is typically installed above a window?
Head flashing, or a drip cap, is installed above the window to shed water over the jambs and sill assembly below, keeping the whole opening protected from top to bottom.
What weight of lead do I need for flashing?
Use the lead weight (lb per square foot) called out in the manufacturer specs and the building codes adopted in your jurisdiction. There's no single universal standard—confirm against the project specifications.
Do roofers still use lead flashing?
Yes. Lead flashing is still used in historic preservation and specialized masonry work for its flexibility, corrosion resistance, and long service life.